Why combine all those images? Isn’t it quicker to have smaller images?
Nope, it’s not. Back in the day, everybody and their brothers were “slicing” images to make pages load faster. All that technique did was fool the eye to make it look like the page was loading faster by loading bits and pieces all over at once. Each one of those images is a separate HTTP-Request, and the more of those, the less efficient your page is.
Every single image, whether it’s an img tag or an background-image from your CSS is a separate HTTP-Request, so you can image how quickly those requests can wrack up.
OK. So how is it done?
I thought you would never ask. Let’s start by showing the BEFORE example. Notice in the CSS below how the anchor tag does not get a background-image, but each individual class does.
#nav li a {background:none no-repeat left center} #nav li a.item1 {background-image:url('../img/image1.gif')} #nav li a:hover.item1 {background-image:url('../img/image1_over.gif')} #nav li a.item2 {background-image:url('../img/image2.gif')} #nav li a:hover.item2 {background-image:url('../img/image2_over.gif')} ...

Using CSS Sprites, we can really lighten this example up. Instead of having ten separate images for the buttons (five default states and five rollover states), we can literally combine all of them into one big long image. I won’t go into great detail about how this is done, I’ll just give you a basic walkthrough. Create a new image that is as wide as your widest image and and as tall as the combined height of all your images plus X pixels, where X is the number of images you have. Now place you images into this new image, left aligned, one on top of the other with one pixel of white space in between.
Now check out the AFTER example. Notice in the CSS that there is a single background-image applied to the anchor element itself, and the unique classes merely shift the background position with negative Y coordinates.
#nav li a {background-image:url('../img/image_nav.gif')} #nav li a.item1 {background-position:0px 0px} #nav li a:hover.item1 {background-position:0px -72px} #nav li a.item2 {background-position:0px -143px;} #nav li a:hover.item2 {background-position:0px -215px;} ...
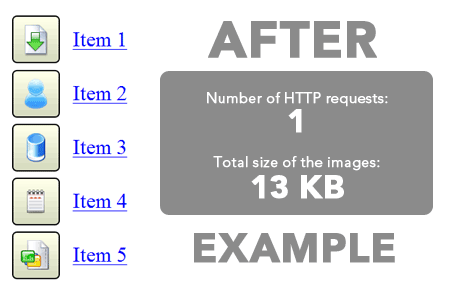
We were able to reduce the number of HTTP-Requests by 9 and the total file size of the image(s) by 6.5 KB. That’s a pretty huge improvement for such a little example. Imagine what you could do on a full website.

Simply ZIP all the images you wish to make available as sprites, fill in some basic information about prefixes and offset amounts, and click a button to generate the combined sprite image and CSS code. Sprite Generators, One more
Its very simple, come on lets try to make our websites faster.
#nav li a {background:none no-repeat left center} #nav li a.item1 {background-image:url('../img/image1.gif')} #nav li a:hover.item1 {background-image:url('../img/image1_over.gif')} #nav li a.item2 {background-image:url('../img/image2.gif')} #nav li a:hover.item2 {background-image:url('../img/image2_over.gif')} ...#nav li a {background-image:url('../img/image_nav.gif')} #nav li a.item1 {background-position:0px 0px} #nav li a:hover.item1 {background-position:0px -72px} #nav li a.item2 {background-position:0px -143px;} #nav li a:hover.item2 {background-position:0px -215px;} ...
Thanks to Admin for Sharing such useful Information. I really like your Blog. Addition to your Story here I am Contributing 1 more Similar Story CSS Sprite images Example to reduce HTTP Requests.
ReplyDelete